
The Silhouette Portrait is our favorite tool for printing and cutting. The Silhouette Studio software has lots of options and flexibility for customizing your prints. This way, you get exactly what you want and have professional results every time.
In this tutorial, we’ll show you the basics of using your YayDay Paper Co. prints to create professional sticker sheets. If you’re new to using a Silhouette Portrait machine, we recommend watching this video a few times and reading very carefully through the written instructions. You’ll also want to have this tutorial in front of you as you create your sticker sheets.
Are you ready?! Let’s do this!
STEPS FOR CUTTING STICKER SHEETS WITH SILHOUETTE
- Open Silhouette Studio
- Click File > Open then select two YayDay Paper Co. files. You’ll want to open the .PNG image file and the .PNG Blackout filt.
HOW TO CREATE TRACE LINES:
- First, let’s start working with the Blackout File. Click the “Trace” icon from the menu panel and drag a box around all the black images. Use the Threshold slider to ensure the black images for fully yellow. Then click “Trace Outside Edge.” This will create a trace line.
- Delete the black images.
- Select the Trace lines then click Edit>Copy
- Now head over to the colored image file and select Edit>Paste. This will insert the trace line.
- Move the trace lines so they are around the colored images.
CREATE REGISTRATION LINES
- Click the Page Set Up Icon at the top of the menu panel
- Select “Type 1” from the “Style” dropdown menu. This will create registration lines on the page
- Arrange the images and trace lines so they fit within the registration marks and grey hashlines.
HOW TO CREATE STICKER SHEET LINE
- To create a sticker sheet, you’ll need to create a rectangle around the images and tracelines.
- Select the Rectangle Shape tool from the right menu panel, then choose what color you’d like it to be. Make sure the color you select is DIFFERENT than the trace line color. We recommend using blue.
- Drag a rectangle shape around the images and trace lines.
PRINTING
- First go to File > Print Page Setup to make sure you’ve got the correct printer and page size selected.
- Next, select File > Print to send your project to the printer
SENDING PRINT TO THE MACHINE
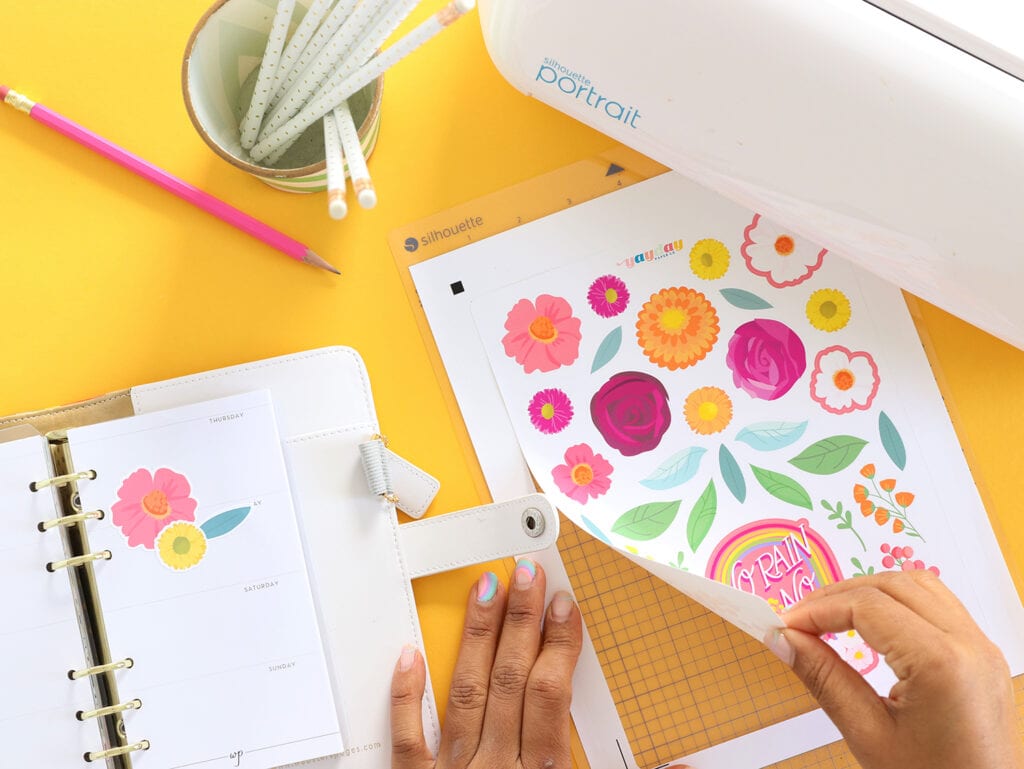
- Once the print is complete, place the print onto the mat and load into your Silhouette machine
- Head back to Silhouette Studio and select “Send”
- Now you’ll want to click “Line” in the “Action By” menu. Here you can tell the Silhouette to treat the lines differently. This means you can kiss-cut the stickers at the trace lines and cut all the way through the paper on the outer rectangle to make a sticker sheet.
- To do this, change the material setting for each line color.
- Now click “Send” at the bottom of the screen and you’re project will be sent to your machine to cut!
Hello, Amber 🙂 Lovely project, which look easy enough… we’ll see, lol. Thank you!