
By now you know that around here, we’re all about getting crafty with your printer! Well today you’re going to learn how to print on a treat bag – because who says you can only print on paper?! Not us!
One of the most frequently asked questions from YayDay members and would-be YayDay member is: What printer should I use?
Truth is, you have a huge variety of printer options out there but we regularly tout how much we love the Canon PIXMA TS9521C Crafting Printer. For creative types like you, this printer does an incredible job of opening up a world of possibilities…including the project that we’re sharing in this tutorial!
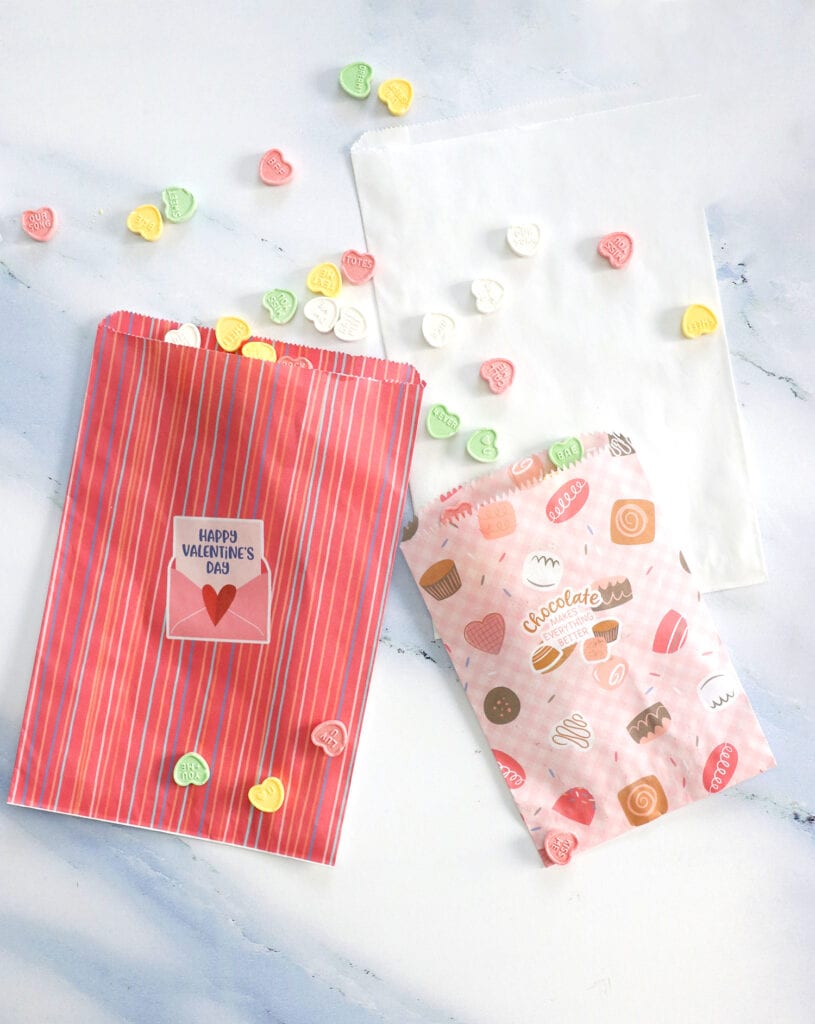
The Canon crafting printer can print on a huge variety of materials thanks to the rear feed tray. Today, we’ve got an awesome hack that will allow you to customize your own treat bags – something you would typically have to outsource to a professional print shop. Take a look and see just how easy this is to do!
SUPPLIES:
- Canon PIXMA TS9521C Printer
- Plain white treat bags
- Paper/Cardstock
- Pencil
- Removable Adhesive Tape Runner
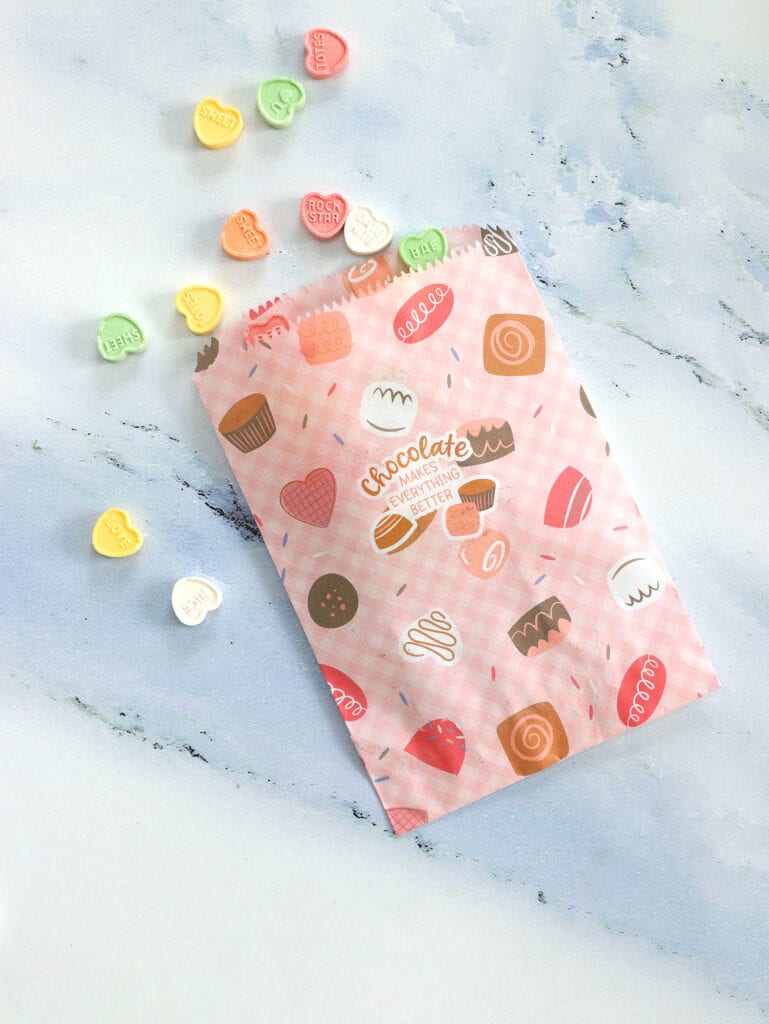
- YayDay Paper Co. patterned paper prints (we used the Sending Love Stationery Bundle for this project!)
STEPS:
- In Canva (a free design software) create an 8.5×11” design
- Click the “Uploads” option in the left menu and import your favorite YayDay Paper Co. patterned paper file. Make sure you select the .jpg version of the file.
- The pattern paper image will appear in the Uploads section. Drag the image onto the canvas and resize it to the size of your treat bag. TIP: Size the design to be a tad larger than the treat bag.
- Once you’ve completed your design in Canva, download and save as a PDF Print
- Open the PDF Print in Adobe Acrobat and print on regular cardstock using your Canon PIXMA TS9521C printer.
- Trace the outline of the treat bag directly onto the print out.
- Apply removable adhesive along the edge of your pencil tracing line. Make sure to stay as close to the pencil line as you can.
- Adhere a plain white treat bag onto the print out using the traced line as a guide.
- Place the paper into the rear tray of the printer with the top of the treat bag facing down.
- Print the PDF print again. This time, you’ll be printing on the actual treat bag!
With this hack, you can customize treat bags for any occasion. With the Canon crafting printer, you’re able to print on thicker materials allowing for your imagination to go wild!
This post was created in partnership with Canon.